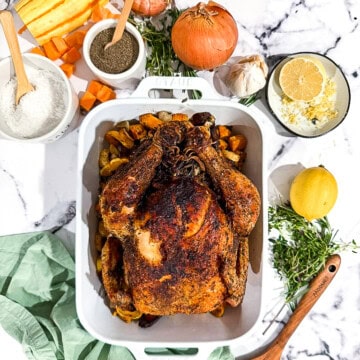
Air Fryer Whole Chicken (Crispy Skin, Juicy Meat)
This post may contain affiliate links. If you purchase through these links, I may earn a small commission at no extra cost to you. I only recommend products I genuinely use and love. Thank you for supporting Home & Fed. Please read our disclosure policy for details.
The kind of meal that makes your whole house smell like Sunday dinner—except it's Tuesday and you barely lifted a finger.

The Air Fryer Whole Chicken That Changed My Mind.
If there's one thing I've learned about making an air fryer whole chicken, it's that the first attempt doesn't always go as planned.
My first try ended with a beautiful golden top and a concerningly undercooked bottom. I had to carve the whole thing and finish the pieces separately. Not exactly the dinner moment I was going for.
But here's the thing—I figured out what went wrong, and now this air fryer whole chicken is one of my favorite-without-the-effort dinners. The skin is impossibly crispy, the meat is incredibly juicy, and the secret is simpler than you'd think: a dry brine with salt, pepper, and herbs de Provence the night before, one crucial flip halfway through, and a final flip back at the end to crisp up that gorgeous skin.
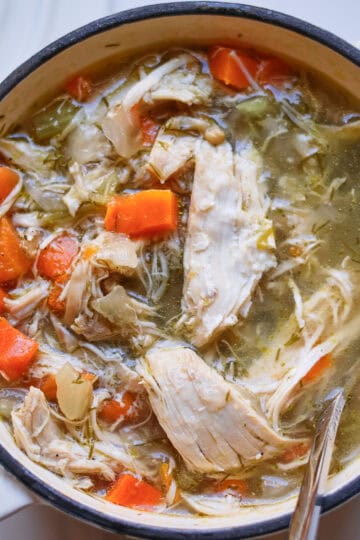
Roasted chicken has actually been a staple for me for years. Back when I was single and working long hours at my marketing job, this was my go-to weekly meal prep—though I made it in the oven back then. One chicken would carry me through the week: salads, sandwiches, soups, you name it. I even used leftover chicken to make quesadillas with my homemade flour tortillas. The air fryer version is even faster and the skin is crispier.
This recipe might just have you skipping those Costco rotisserie chickens. By the time you drive there, find parking, grab the chicken, and get back home, you could have prepped this one to brine and had dinner ready with way better flavor.
This isn't a set-it-and-forget-it recipe, but it is a pay-attention-for-two-minutes-then-forget-it recipe. And the payoff? That first crackle when you slice through the skin.
Why You'll Love This Air Fryer Whole Chicken
- Crispy skin, juicy meat. The dry brine pulls moisture from the skin while seasoning the meat throughout—the result is skin that crackles and meat that stays tender.
- Mostly hands-off cooking. Once it's in the air fryer, you flip it once at the 40-minute mark, then flip it back for the last 5-10 minutes. The rest of the time? You're free.
- Faster than the oven. A 5-pound chicken roasts in about 80 minutes versus 90+ in a traditional oven, and the air circulation gives you better crisping.
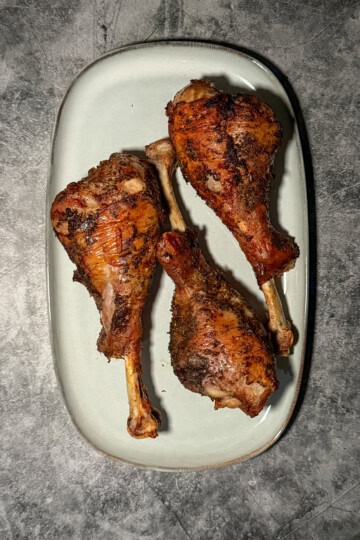
- Low oil, high crisp. Using avocado oil spray means you get that gorgeous golden skin with way less oil than traditional roasting. I use the same technique on my Chicken Leg Quarters and the skin comes out just as crispy.
- One-pot potential. If you have the Ninja Crispi Pro, you can brine and cook in the same 6-quart container with the crisper plate—truly minimal cleanup.
What Makes This Air Fryer Whole Chicken Different
This isn't just about throwing a chicken in an air fryer and hoping for the best. It's about understanding why things work—and what can go wrong if you skip the important steps.
The dry brine is non-negotiable. Salting the chicken with sea salt, pepper, garlic powder, and herbs de Provence (I stock up on 5 jars when Trader Joe's has theirs in season) does two things: it seasons the meat all the way through, and it dries out the skin so it can actually crisp instead of steam. Brine for at least 8 hours—overnight is even better.
That flip at 40 minutes? That's the difference between dinner and disaster. (Believe me, it happened to me.) Most air fryers circulate heat from the top down, which means the bottom of your chicken can end up undercooked if you don't rotate it. I learned this the hard way so you don't have to.
And the final trick: flip it back breast-side up for the last 5-10 minutes and switch from ROAST to AIR FRY mode. This gives you that extra blast of heat to really crisp up the skin. It's the difference between good skin and skin that crackles.
What you'll need for this recipe:
How to Make Air Fryer Whole Chicken
The Day Before (or Morning Of): Dry Brine
Remove the giblets and neck from inside the 1 whole roaster chicken (4-5 lbs / 1.8-2.3 kg) cavity. Season the entire chicken generously with 1½ tablespoons (22g) fine sea salt, 1-2 teaspoons (3-6g) black pepper, 1 tablespoon (5g) herbs de Provence, and 1 teaspoon (3g) garlic powder—make sure to get inside the cavity too. Place the chicken on the crisper plate inside your largest Ninja Crispi Pro container (the 6-quart) and refrigerate uncovered for at least 8 hours. You can brine overnight or start it in the morning to cook for dinner. No need to pat dry after brining—just drain any juices that have accumulated.
Day Of: Prep and Season
Remove the chicken from the fridge 30 minutes before cooking. Stuff the cavity with 1 head of garlic (bottom cut off to expose the cloves), 1 lemon (cut into quarters), and fresh poultry herbs—½ packet each of rosemary, thyme, and sage. Truss the chicken with kitchen twine to help it cook evenly and hold its shape. Give the entire chicken a good spray with avocado oil spray.
Cook the Chicken
Place the container with the crisper plate and chicken into the Ninja Crispi Pro (modular base in the LOW position for the 6-quart container). Select ROAST mode at 375°F (190°C) for 1 hour 20 minutes total.
At the 40-minute mark, carefully flip the chicken to breast-side down using oven mitts and tongs.
With about 5-10 minutes remaining, flip the chicken back to breast-side up and switch to AIR FRY mode. This final blast crisps up the skin beautifully.
Check for Doneness
Use a digital meat thermometer to check the internal temperature in the thickest part of the thigh (not touching bone). The chicken is done when it reaches 165°F (74°C). I use a digital meat thermometer that lets you set the meat type, and it automatically sets the temperature according to the meat—it takes all the guesswork out.
Rest and Serve
Let the chicken rest for 10 minutes before carving. This redistributes the juices so they don't run all over your cutting board.
Sherisse's Tips for Perfect Air Fryer Whole Chicken
- Brine for at least 8 hours. You can start it in the morning and cook for dinner, or brine overnight for even better results. The longer the brine, the more flavorful and tender the meat.
- Don't skip the flip—or the flip back. Flip to breast-side down at 40 minutes so the bottom cooks through, then flip back breast-side up for the last 5-10 minutes to crisp the skin.
- Use a digital meat thermometer. I use one that lets you set the target temperature and beeps when it's reached. No more guessing, no more cutting into the meat to check. It works for chicken, beef, pork—everything.
- Truss your chicken. Tying the legs together with kitchen twine helps the chicken cook more evenly and keeps its shape nice and compact.
- Avocado spray for the win. Less oil, same crispy skin. I use Chosen Foods Avocado Oil Spray and love the results.
- Let it rest. 10 minutes feels long when you're hungry, but it makes a real difference in how juicy your carved chicken will be.
Equipment Needed
Air Fryer Whole Chicken Variations
- Herb Butter Chicken: Gently loosen the skin over the breast and thighs and spread my Herb Butter underneath before cooking. The butter bastes the meat as it roasts for incredibly juicy, flavorful results.
- Lemon Herb Chicken: Add lemon halves inside the cavity along with the garlic and herbs. The citrus adds a beautiful brightness.
- Smoky Spiced Chicken: Add smoked paprika and a pinch of cumin to your dry brine seasoning blend.
- Za'atar Chicken: Swap the herbs de Provence for za'atar spice blend—the tangy, herby notes are incredible.
- Butter-Basted Finish: For extra richness, brush with melted butter after the final flip instead of more oil spray.
Storage & Reheating
Refrigerator Storage: Store carved chicken in an airtight container for up to 4 days.
Freezer Storage: Cooked chicken freezes well for up to 3 months. Thaw overnight in the refrigerator before reheating.
Reheating:
- Oven (best for crispy skin): 350°F for 15-20 minutes until heated through
- Air Fryer: 350°F for 5-8 minutes to recrisp the skin
- Microwave: Works for quick reheating but the skin will soften
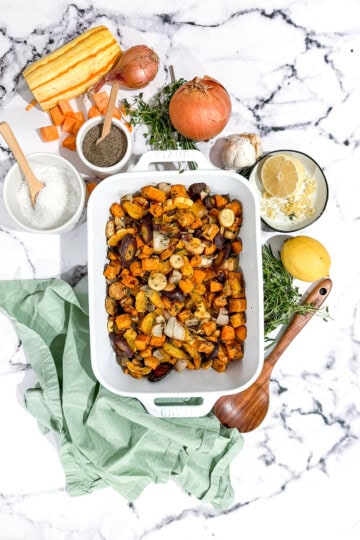
What to Serve With Air Fryer Whole Chicken
Herbed Root Vegetables: Toss baby potatoes, carrots, and parsnips with olive oil, fresh rosemary, thyme, salt, and pepper. Roast at 400°F for 40-45 minutes while the chicken cooks. Finish with fresh lemon zest for brightness.
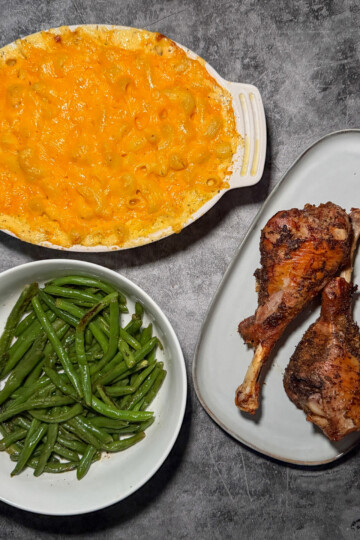
Other Great Sides:
- Creamy mashed potatoes
- Simple green salad with lemon vinaigrette
- Crusty bread for soaking up the juices
- Roasted broccoli or green beans
- Rice pilaf or couscous
- Mac & cheese if you're looking for a comfort meal
Leftover Ideas:
- Chicken quesadillas—keep the crispy skin on for extra flavor & texture
Air Fryer Whole Chicken Variations
- Herb Butter Chicken: Gently loosen the skin over the breast and thighs and spread my Herb Butter underneath before cooking. The butter bastes the meat as it roasts for incredibly juicy, flavorful results.
- Lemon Herb Chicken: Add lemon halves inside the cavity along with the garlic and herbs. The citrus adds a beautiful brightness.
- Smoky Spiced Chicken: Add smoked paprika and a pinch of cumin to your dry brine seasoning blend.
- Za'atar Chicken: Swap the herbs de Provence for za'atar spice blend—the tangy, herby notes are incredible.
- Butter-Basted Finish: For extra richness, brush with melted butter after the final flip instead of more oil spray.
Air Fryer Whole Chicken
Equipment
- Digital meat thermometer
- Kitchen twine
- Oven mitts
- Tongs
Ingredients
- 4 - 5 pound whole roaster chicken (4-5 lbs / 1.8-2.3 kg) giblets and neck removed
- 1 ½ tablespoons fine sea salt (22g)
- 1-2 teaspoons black pepper (3-6g)
- 1 tablespoon herbs de Provence (5g)
- 1 teaspoon garlic powder (3g)
- 1 whole head garlic bottom cut off to expose cloves
- 1 whole lemon cut into quarters
- ½ packet fresh rosemary
- ½ packet fresh thyme
- ½ packet fresh sage
- Avocado oil spray I use Chosen Foods
Instructions
- Remove giblets and neck from inside the 1 whole roaster chicken (4-5 lbs / 1.8-2.3 kg) cavity.
- Season the entire chicken generously with 1½ tablespoons (22g) fine sea salt, 1-2 teaspoons (3-6g) black pepper, 1 tablespoon (5g) herbs de Provence, and 1 teaspoon (3g) garlic powder, making sure to get inside the cavity.
- Place chicken on the crisper plate inside the 6-quart Ninja Crispi Pro container.
- Refrigerate uncovered for at least 8 hours or overnight. Drain any accumulated juices before cooking (no need to pat dry).
- Remove chicken from refrigerator 30 minutes before cooking.
- Stuff the cavity with 1 head garlic (bottom cut off), 1 lemon (cut into quarters), and fresh herbs (½ packet each of rosemary, thyme, and sage).
- Truss the chicken with kitchen twine, tying the legs together for even cooking.
- Spray the entire chicken generously with avocado oil spray.
- Place the container with crisper plate and chicken into the Ninja Crispi Pro with modular base in the LOW position.
- Select ROAST mode at 375°F (190°C) for 1 hour 20 minutes.
- At 40 minutes, carefully flip the chicken to breast-side DOWN using oven mitts and tongs.
- With 5-10 minutes remaining, flip the chicken back to breast-side UP and switch to AIR FRY mode to crisp the skin.
- Check internal temperature in the thickest part of the thigh—chicken is done at 165°F (74°C).
- Remove chicken and let rest for 10 minutes before carving.
- Serve with your favorite sides.
Notes
Nutrition
Tried this recipe?
Mention @homeandfed or tag #homeandfed!FAQ
Did you make this recipe?
I'd love to hear how it turned out! Leave a comment below and rate the recipe. Did you make any fun swaps or additions? Tag me on Instagram @homeandfed so I can see your beautiful frittata and share it with the Home & Fed community.
Related
Looking for other recipes like this? Try these:

The fed journal
welcome home.
Join The Fed Journal and get weekly recipes, kitchen wisdom, and stories from my table to yours — delivered straight to your inbox every week. No spam, no fluff. Just real recipes, honest kitchen stories, and the kind of encouragement that makes you want to cook dinner tonight.